
Today we will make beaded sprocket. It is an original but simple beaded product.
We will need:
- Czech seed beads; I made a few monochrome sprockets out of seed beads #8 of yellow, light-blue and light-green colors, but you can make them multicolored,
- nylon line 0.25 mm in diameter and two needles for beadweaving (as usual, you can do with only one needle).
For beading we will use the technique of brick stitch. This beading technique is well-known to us; the basics of such a technique you can study from this and this tutorials.
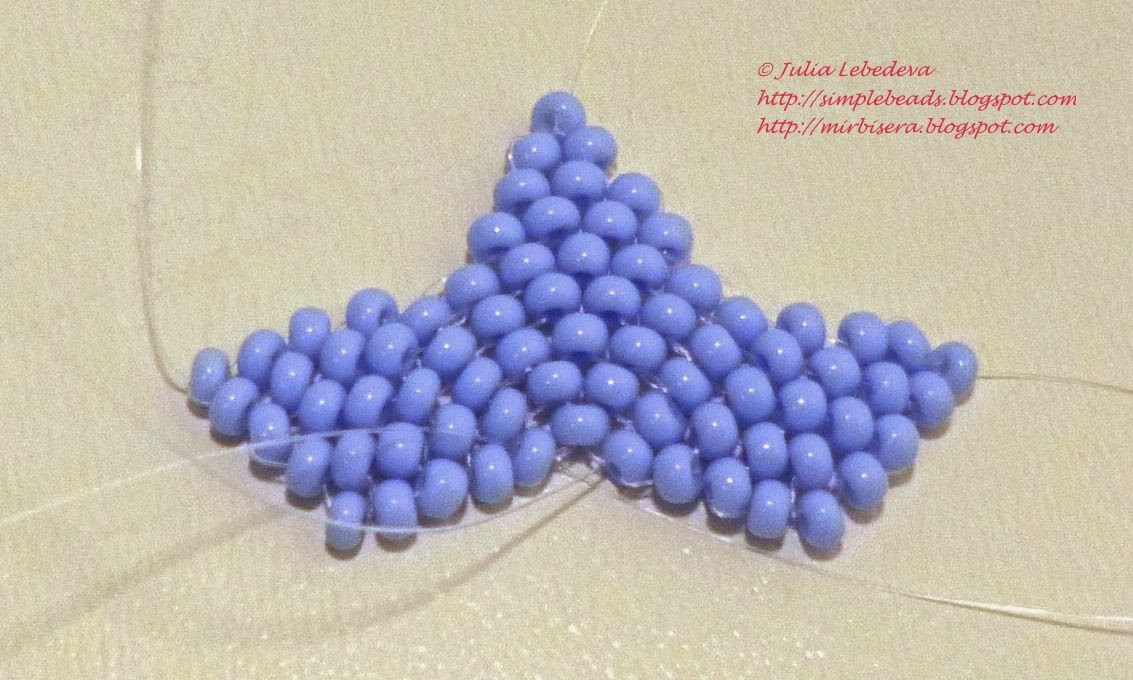
Every sprocket consists of five identical rhombs.

For the each rhomb take a nylon line of 50 cm in length. Start weaving on the middle of the line because for weaving will be used the both ends of the line.
The weaving pattern is very simple:
Step 1: weave a single chain consisting of 5 seed beads.
At the beginning of the each next row string only one bead.
Step 2: 4 beads;
Step 3: 3 beads;
Step 4: 2 beads;
Step 5: only 1 bead.
We’ve got the first half of the rhomb. To make the second half repeat Steps from 2 to 5 at the other side of the first row.
After that you may fix one end of the line. It is preferably to leave the second end of the line unfixed for now. You will use it later to connect this rhomb to the other rhombs.

When you have made five rhombs, connect them to each other to get a sprocket.
To do this, lay out all the rhombs in a circle so that their sharp ends were pointed to the center, and then sew the adjacent rhombs together by contiguous verges.


Connect all the five rhombs - the sprocket is finished!

These sprockets can be perfect Christmas decorations, especially if you make them in large quantity and in different colors!

Using this pattern you may also make original earrings. To do them you should weave such sprockets out of small seed beads (for example, of beads #11 or even of #15) and attach ear hooks to them.
P.S. Don't want to miss new tutorials? Subscribe for email notifications of site updates!
If you like this tutorial, share it with your friends on social networks using the buttons below the post.
No comments:
Post a Comment