")
Today we will learn one more beading technique: a tubular peyote stitch. It is a kind of peyote stitch technique that was already used in our tutorials. Using this beading technique we will decorate a pen with seed bead.
We will need:
- a pen to be decorated; I used an ordinary gel pen with an outer diameter of 9 mm,
- Czech seed beads #10; I used seed beads of red and blue colors,
- nylon thread and a needle for beading.
As I have just said, a tubular peyote stitch technique is a kind of peyote stitch beading technique that is already known to us. So to move forward you need to know the basics of such a beading technique. If you don’t know them, first learn this tutorial.
As well as in flat peyote, tubular peyote may be worked with either an even or an odd number of beads per row. Both types of tubular peyote need one needle for weaving. With an even number of beads the rows are clearly separated from each other. But with an odd number of beads the weaving is carried in an endless spiral and the rows are not separated from each other.
Today we will use an even number of beads per row. Besides that, if we want to get a two-colored spiral pattern, the number of beads in a row should be divisible by four.
If you use as a base an ordinary gel pen with an outer diameter of 9 mm and Czech seed beads of #10 size, this condition is fulfilled quite well: there are exactly 20 beads in a row around the pen. If your pen is not perfectly round (but, for example, is hexagonal), it can also fit.
Please note: as we use an even number of beads in a row, the weaving is carried by rows, not in spiral. So, the resulting two-colored spiral is just an image.
As usual, for all the beadwork you will need a very long thread, so I recommend you to take the thread of a convenient length (about 1 meter). As soon as it becomes too short you should fasten it, passing in a zigzag manner through several beads, and then cut it off. Next, take the new thread, weave it into the product in the same manner and then continue weaving using this new segment of thread.
Start weaving. String onto the thread 2 red beads, then 2 blue beads, next 2 more red beads, again 2 blue beads and so on, making sure to string 20 beads in total. Place the set of beads about 20 cm from the free end of the thread.

Pass the needle through all the beads starting from the free end of the thread.
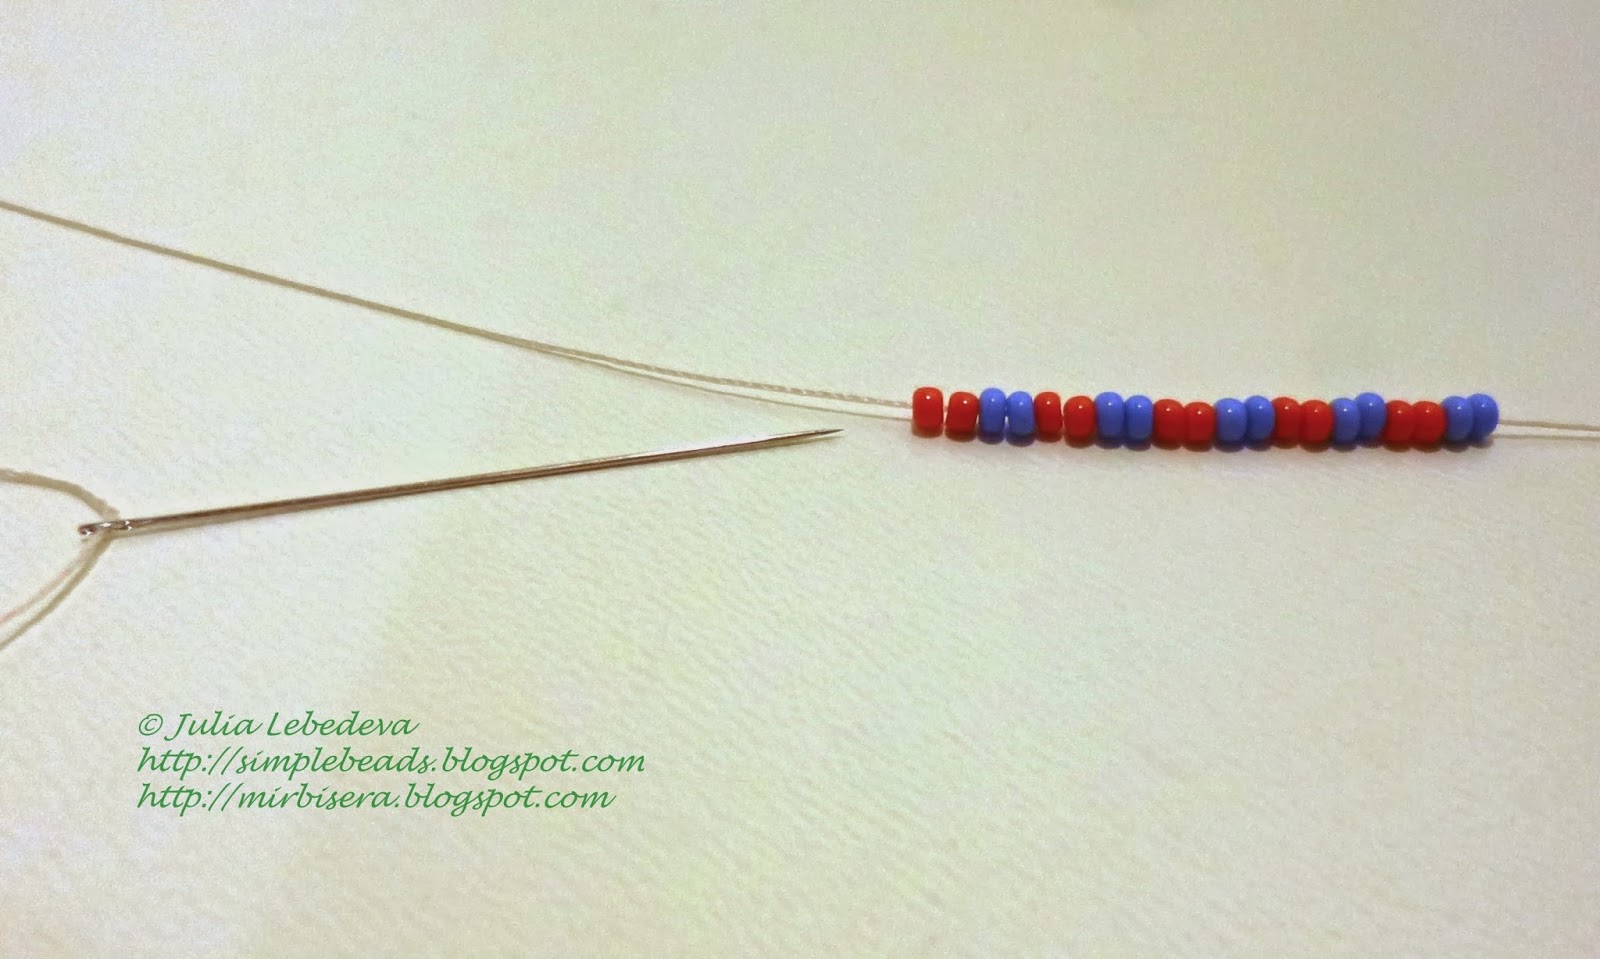

Tighten the thread. Make sure that the free end of the thread remains of at least 20 cm in length. We will no longer need this end of the thread, so later we will fix it and cut it off.

The resulting circle of beads is the base of peyote tube. Since the rows of beads in peyote stitch are counted diagonally, there are two rows of beads in this circle. The 1st row consists of the first beads in colored pairs of beads, and the 2nd row consists of the second beads in pairs.

Start weaving the 3rd row. String onto the thread the bead of the same color as the color of the bead from which the thread comes out at the moment. If you strictly follow my tutorial, this is a bead of blue color. We should place this new bead above the first red bead in the original circle. To do that, pass the needle through the second red bead in the circle.


The color of the second bead in the 3rd row determine using the above mentioned rule: use the bead of the same color as the color of the bead from which the thread comes out at the moment. At now it is a red bead. To place this bead above the first bead of the next pair of beads in the original circle, pass the needle through the second bead of this pair of beads.

Keep on weaving the 3rd row so on: place every next bead above the first bead of the next pair of beads in the original circle, passing the needle through the second bead of this pair. The color of beads in this row and in all the next rows determine by the mentioned rule: use the bead of the same color as the color of the bead from which the thread comes out at the moment.
The total number of beads in the third and each subsequent row is 10 beads.
Upon completion of the row lead the thread out on the top of the beadwork. To do so when you plait the last bead in the row pass the needle not only through the last bead of the previous row but also through the first bead of the current row.

Thus, at the time when we have completed the row, the thread should come out from the first bead of the just completed row. You should do so upon completion of the each next row.

Before you keep on weaving, put the beaded tube onto the pen. Make further weaving directly on the pen. At this stage you can see the beginning of alternating red and blue spirals and it is clear that every three consecutive beads of the same color lay in three different rows of peyote tube.

Therefore, the following weaving is simple: every next row consist of 10 beads each of which is placed between two beads of the previous row. As has been said many times above, the color of the each next bead should be determined by the color of the bead, from which the thread comes out at a given moment.
At the end of each row lead the thread out on the top of the beadwork.
Thus, after completion of the 4th row the beadwork looks like this:

And after completion of the 5th row - as follows:

Using the same method continue weaving the following rows through the entire length of the pen - so that the rows of beads almost reach the very top of the pen.


After that we should braid the top of the pen. It remains to weave just three rows of beads to complete it. For our convenience, I will keep score of these rows again, beginning with the first row.
The top of the pen will look most nice if you braid it with beads of one color. Use the beads of the same color as the color of the bead from which the thread comes out at now. For my pen it is blue color.
But for the tutorial purposes I will use beads of different color for the each remaining row. So you can easy understand from the photos where the beads of the each row are placed.
In the 1st row of the top we should reduce the number of beads. The first bead in this row plait in the usual way,


but instead of the second bead we should leave an empty space. So, without stringing a new bead, pass the needle through the next blue bead of the previous row.


Then repeat this sequence four more times: when the thread comes out from the blue bead plait the bead in the usual way, and after that miss the next bead. At the end of the row lead the thread out on the top of the beadwork, so that it came out from the first bead of the just completed row.


The other rows of the top make in the usual way, without changing the number of beads in the rows.
The 2nd row of the top consist of 5 beads, each of which is placed between two beads of the previous row.

The 3rd row is the last row. Weave it in the usual way: it consist of 5 beads, each of which is placed between two beads of the previous row.
At the following photo you can clearly see the mutual disposition of beads in the last three rows:

If for the top rows you use the beads of only one color (blue color for my pen), the braided top of the pen looks as follows:

At now fix the remaining ends of the thread at the both ends of the pen and after that cut them off.

The beaded pen is finished!
P.S. If you like this tutorial, share it with your friends on social networks using the buttons below the post.
Don't want to miss new tutorials? Subscribe for email notifications of site updates!
very nice
ReplyDeletelove it
ReplyDeleteThank you for appreciation of my work. I will be very grateful if you share this tutorial with your friends on social networks.
Delete