Tuesday, December 1, 2015
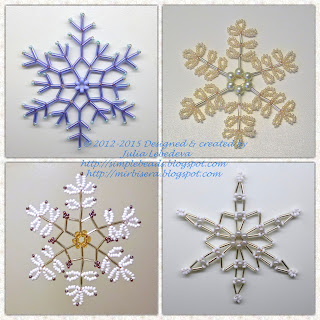
Snowflake of bugle beads, seed beads and round beads
We continue our seasonal series of beading tutorials on winter and Christmas beadworks. Today we will make one more snowflake.
We will need:
- bugle beads #3 (I used bugle beads of silver color);
- seed beads #10 (I used seed beads of white color);
- round beads 4 mm in diameter (I used round beads of light gray color);
- wire 0.3 mm thick and 1 meter long.
Start weaving and make the first beam of the snowflake. String on the wire beads in the following sequence: one round bead, one bugle bead, one seed bead, one round bead, one seed bead, one bugle bead, one seed bead, one round bead, one seed bead, one bugle bead, six seed beads. Place the set of beads so that the free end of the wire from the side of the first round bead is about 15 cm long.
Make further weaving using only the longer end of the wire. Hold the five last added seed beads and pass the wire backwards through the next seed bead (the 6th seed bead if we count from the end of the set).
Tighten the wire trying its free end to remain about 15 cm long. We’ve got a loop of seed beads that is the tip of the snowflake’s beam.
Then string on the wire one bugle bead and one seed bead
and pass the wire through the nearest round bead, leading the wire from the side of the beadwork’s beginning.
Tighten the wire.
Next, string on the wire one seed bead, one bugle bead and one more seed bead
and pass the wire through the next round bead, again leading the wire from the side of the beadwork’s beginning.
Tighten the wire.
After that string one seed bead and one bugle bead
and pass the wire through the very first round bead in the beadwork, this time leading the wire in the opposite direction (i.e. to the beadwork’s beginning).
Tighten the wire. The first beam of the snowflake is finished.
Next, in the same manner make the second beam, close to the first one.
And after that make four more the same beams to get six beams that are situated close to each other.
The next photo shows all the six beams which have just been made. Please note: the first and the last beams are not connected together yet.
Now connect the first and the last beams together so that the round beads in the base of all the beams make up a tight circle. To do that, pass the working end of the wire (that comes out from the last beam) through the first beam in the following order: at first, pass it through the round bead in the base of the first beam, then through the next bugle bead, further through the seed bead and through the next round bead.
At this stage you may secure and trim the starting tail of the wire (on the photo below this tail is still visible, I just passed it in the same manner through the last beam and left in alone, but you may secure it more thoroughly and then trim).
Next, we need to connect the each pair of beams with segments of seed beads and bugle beads. String on the wire one seed bead, one bugle bead, again one seed bead, again one bugle bead and one more seed bead and after that pass the wire through the round bead that lies in the the next beam in the same tier as the round bead from which the wire comes out at the moment.
Repeat the last step five more times thus connecting to each other all the other beams in a circle.
Now secure and trim the excess end of the wire and at last, straighten the beams. The snowflake is finished!
You can find a few other tutorials on beaded snowflakes on our site. By making different kinds of snowflakes and also by using different colors of beads and bugles, you can create a truly fabulous beaded blizzard!
P.S. If you like this tutorial, share it with your friends on social networks using the buttons below the post.
Don't want to miss new tutorials? Subscribe for email notifications of site updates or follow us on Twitter!
Subscribe to:
Post Comments (Atom)


Thank you for these excellent tutorials!
ReplyDeleteDo you have free instructions for brick stitch earring patterns.
ReplyDeleteI think all of her patterns are free.
DeleteLove the snowflakes
DeleteJulia,
ReplyDeleteI'm a programming coordinator for a bead society and I'd like to obtain your permission to use/teach your pattern at an upcoming meeting. Our attendance at the meeting might be 75 enthusiastic beaders. Please advise. We love your pattern.
Hi, you can use my patterns, photos and tutorials freely if your meeting is nonprofit. The only thing I ask you is to give a credit to the author and indicate my site's address as a source of information. I wish you and all the beaders happy beading!
Delete